AWS Batch
Amazon Web Services Batch has been created to provide a simple way of running containers and simple commands on AWS without you having to closely manage the underlying EC2 infrastructure (although a knowledge of the underlying infrastructure will always be useful). While AWS Batch does not have an understanding of CWL like a full-on workflow engine, it does provide one of the simplest ways to run a large number of Dockstore tools at scale. Additionally, it provides an opportunity to run tools and manage resources almost totally from a GUI.
For this tutorial, we will assume that you’ve run through the AWS Batch Getting Started tutorial. We will mainly be focusing on things that you will need to consider when running Dockstore tools, while also providing a brief overview of the process.
Additionally, keep in mind that if you have a knowledge of CWL and/or do not need the Dockstore command-line to do file provisioning, you can decompose the underlying command-line invocation for the tool and use that as the command for your jobs, gaining a bit of performance. This tutorial focuses on using cwltool and using the Dockstore command-line to provide an experience that is more akin to running Dockstore or cwltool on the command-line out of the box.
Unfortunately, you will need to do the most difficult step first. You will need to determine how much disk space you want to run your tool. This can vary wildly from tool to tool. For the tools in this tutorial, we went with 100 GB of space for the root disk and 100GB for the Docker volume to run our sample data, up from 8 GB and 22 GB respectively. Next, you will need to create an image or AMI with this setup. Here you have a couple of options:
Follow Creating a Compute Resource AMI from scratch
Or launch the default ECS-Optimized AMI, follow these instructions to expand the EBS volume and then notify Linux about the increased volume size before creating an AMI. Be careful to delete that touch file mentioned in the first tutorial. In our testing, we went with this second option, but both should work.
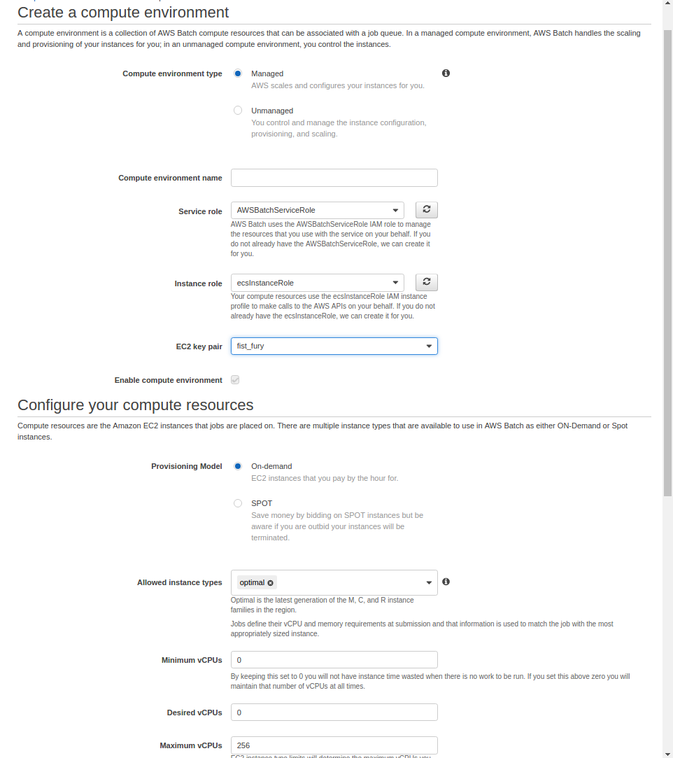
Create your Compute Environment. Start with a managed environment and specify the instance role that you setup in the previous step. You may also want to specify a specific instance type if you want to ensure that only one tool/workflow runs on one VM at a time to conserve disk space.
When you created your compute environment, you picked or created an IAM role for your instances (ecInstanceRole in the screenshot). If you want either your input data or output data to live on S3, add that policy to the role.
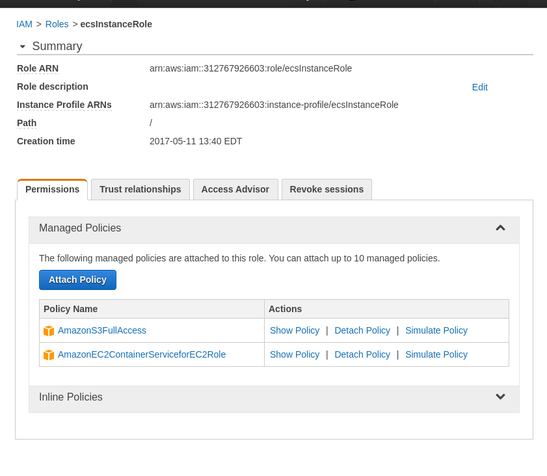 Effectively,
this allows programs running on your VMs access to S3 buckets to read
input files and write output files. You can also use a read-only
policy if you only need to read input files from S3 or create a new
policy with access to only specific buckets.
Effectively,
this allows programs running on your VMs access to S3 buckets to read
input files and write output files. You can also use a read-only
policy if you only need to read input files from S3 or create a new
policy with access to only specific buckets.Create a job queue. There’s not too much to add here.
Create your job definition.
For your image, you will want to specify
quay.io/dockstore/batch_wrapper:1.0or the latest tagged version here. This wrapper provides cwltool and the Dockstore CLI, as well as some trivial glue and demo code.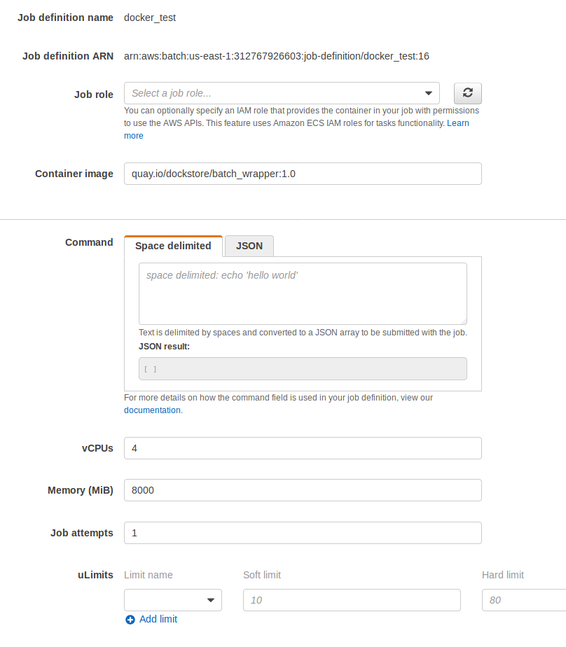
Specify a number of CPUs and an amount of memory that is appropriate for your job. Our understanding is that this will not actually kill jobs that float above the threshold, but it will control how many jobs can be stacked in your instances.
Specify volumes and mount points. Refer to the following image.
/datastoreis mounted to provide access for file provisioning./var/run/docker.sock/is provided to allow cwltool to launch your desired Docker container using the Docker daemon.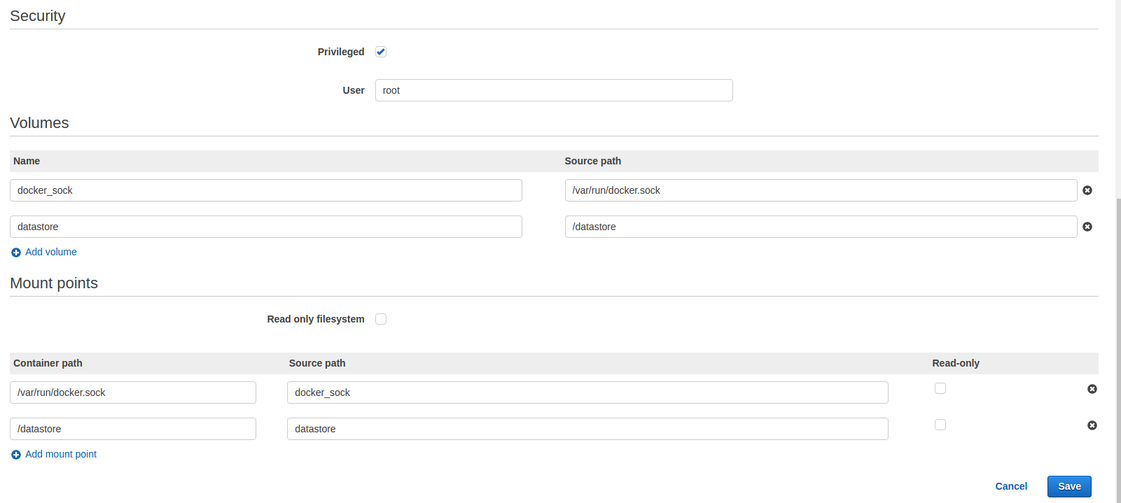
Create your job. Here you will specify the tool that you wish to run and the parameters that it will take.
For a quick test, you can try the command
/test.sh quay.io/briandoconnor/dockstore-tool-md5sum:1.0.3 https://raw.githubusercontent.com/dockstore/batch_wrapper/master/aws/md5sum.s3.jsonafter modifying md5sum.s3.json to point to your S3 bucket rather than dockstore.temp and uploading it somewhere accessible. This will run a quick md5sum tool that copies the result to a S3 bucket (credentials are provided via that IAM role) in just a few minutes.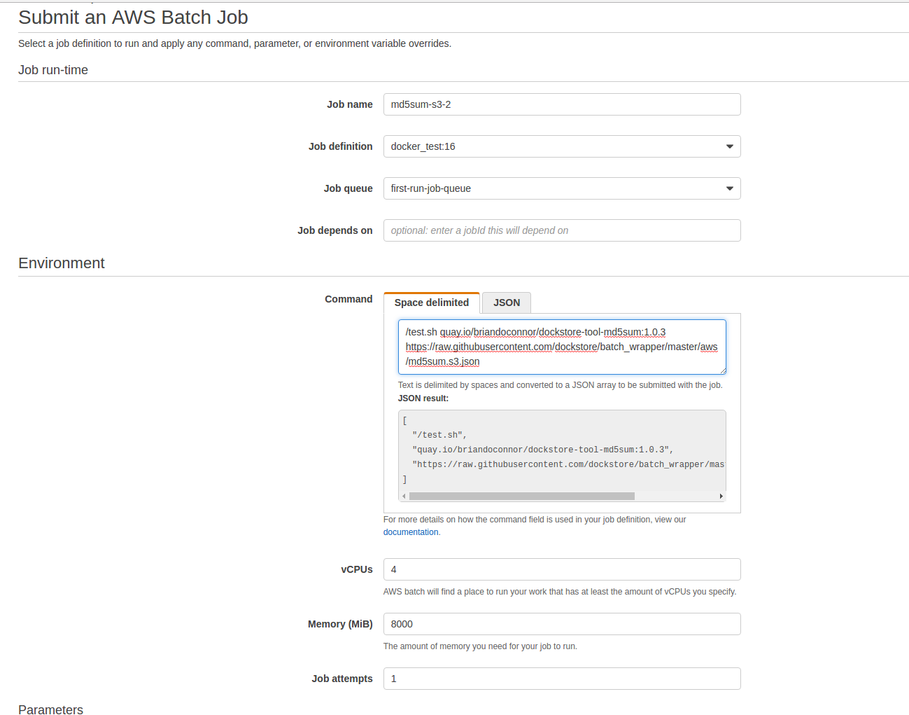
For more realistic jobs, you can try the PCAWG project BWA and Delly workflows which would use the commands
/test.sh quay.io/pancancer/pcawg-bwa-mem-workflow:2.6.8_1.2 https://raw.githubusercontent.com/dockstore/batch_wrapper/master/aws/bwa.s3.json(approximately seven hours) and/test.sh quay.io/pancancer/pcawg_delly_workflow:2.0.1-cwl1.0 https://raw.githubusercontent.com/dockstore/batch_wrapper/master/aws/delly.local.json(approximately six hours) respectively. In the first case, modify the S3 bucket for your environment, in the second case the results will be saved to the local VM’s/tmpdirectory and will vanish after the VM is terminated.
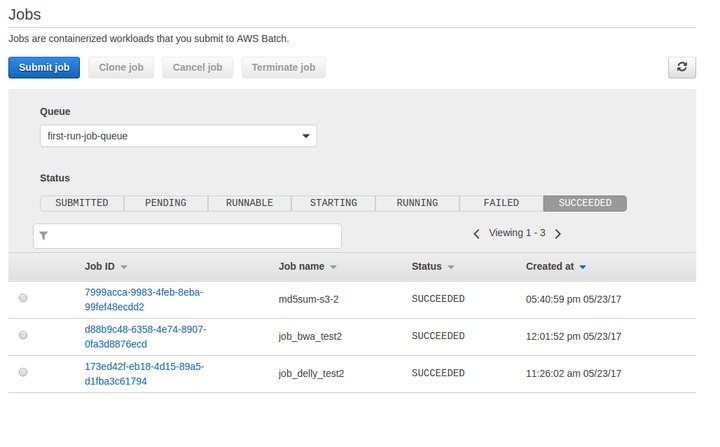
Submit your job, wait for the results to show up in your S3 bucket, and celebrate. You’ve run jobs on AWS Batch!