Notebooks
Tutorial Goals
Create a notebook in Google Colab
Save a notebook to GitHub from Google Colab
Register a notebook on Dockstore
Publish a notebook on Dockstore
Notebooks are documents that include code, text, images, and other media resources, typically in subsections called “cells”. You can create, modify, and execute notebooks in browser-based, interactive environments like Google Colab and JupyterLab. This document outlines how to create, save, register, update, and publish a notebook on Dockstore.
Overview
In this tutorial, you will create a notebook, save it to GitHub, and register your notebook on Dockstore using our GitHub App, which updates it when your repository changes. More information about the Dockstore GitHub App can be found here.
To create and save your notebook, you’ll use Google Colab, a popular online notebook service. Of course, you can author notebooks in other environments, such as GitHub Codespaces, MyBinder, or Jupyter, but Colab is a clean, easy-to-use option that’s perfect for beginners.
Note
If you’ve already created a notebook, but it’s not on GitHub, start at Save Your Notebook to GitHub. If your notebook is on GitHub, skip to Create Your .dockstore.yml File.
Create a Notebook in Google Colab
To create a notebook, first navigate to the Google Colab site, create a Google account if you don’t already have one (click the Sign In button at upper right, and then Create account), and log into it. Then, click on File > New to open a new notebook. After a few seconds, the main notebook environment appears, with a cursor blinking in a code cell:

Type a line or two of Python into the cell, then execute it by clicking the Run “play” icon to the left. Colab will run your code (behind the scenes, somewhere in the “cloud”) and display the output below. Take a look, and if it’s not right, edit your code and re-run it until you’re happy. Click + Code to add another code cell, or + Text to add a text cell that explains how it works. Move the cells around with the arrows. Then, repeat, over and over again, until it’s done.
Voilà, you’ve created a notebook!
Save Your Notebook to GitHub from Google Colab
To allow Dockstore to read your notebook, you must save it to a GitHub repository.
First, log into your GitHub account and create a repository for your notebook. Pick a good repository name, because it will be part of your notebook’s name on Dockstore.
Then, link your notebook environment to your GitHub account and save your notebook to the repository.
Note
This tutorial explains how to save from Google Colab. To save from another notebook environment, either: a) link the environment to your GitHub account and commit the files, or b) save the notebook files locally and push them to your repository using a Git-based tool.
To save a notebook to GitHub from Google Colab, link to your GitHub account by clicking on the Settings gear icon in the upper right corner and selecting GitHub in the dialog box. Then, click on Authorise with GitHub and authorize Google Colab to access your GitHub account.
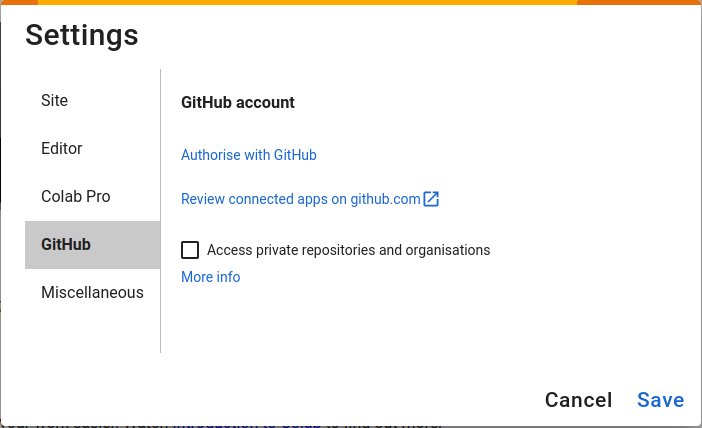
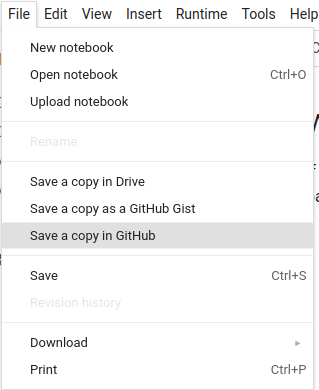
Next, click on File > Save a copy in GitHub to save your notebook to the repository.
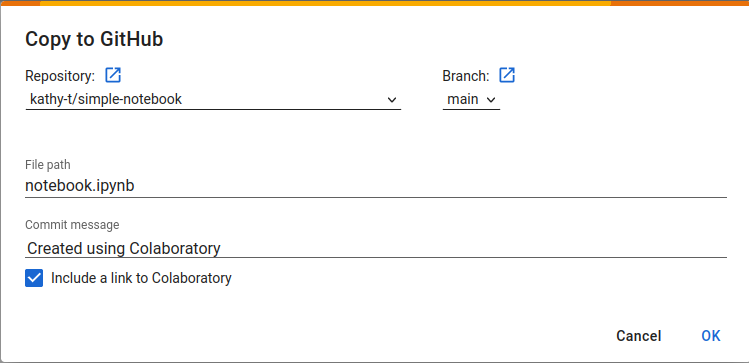
Configure where on GitHub you want to save the notebook to, then click OK. Google Colab will push a notebook commit to your repository.
Congratulations! You’ve saved your notebook to GitHub and are ready to tell Dockstore about it.
Create Your .dockstore.yml File
To describe your notebook to Dockstore, create a YAML file named .dockstore.yml in the root directory of your repository. When you register your notebook, Dockstore will read the .dockstore.yml file to determine the path to your notebook file (and other information about it).
For example, a .dockstore.yml for a simple “hello world” Jupyter notebook might look like:
version: 1.2
notebooks:
  - name: simple
    path: /notebook.ipynb
    topic: A notebook that prints a greeting
Line 1 specifies the .dockstore.yml version. You should use the latest version, which is version 1.2.
Next is the notebooks field, which specifies details about your notebook. Although this field can by used to describe multiple notebooks, we’re only including one here.
Within, the path field specifies the absolute path to the notebook file in the Git repository, and the topic field, which provides a short description (150 characters or less) of the notebook.
You can specify additional details in your .dockstore.yml, such as the notebook’s authors and description. For more information about the file format and supported fields, see here.
Register Your Notebook
Note
You do not need an account to search for workflows on Dockstore or to launch them with our compute partners. However, to register content on Dockstore, you must have an account on Dockstore and link the necessary third-party accounts. Once this is done you can register workflows from the My Workflows page, tools from the My Tools page, notebooks from the My Notebooks page, or services from the My Services page.
To register your Notebook on Dockstore, install our Dockstore GitHub App on the repository that contains your notebook and .dockstore.yml file. After installation, Dockstore will read your repository, automatically register your notebook, and update the notebook whenever the repository changes.
Note
Our docs sometimes use “GitHub App registration” and “registration with a .dockstore.yml file” interchangeably, as they are equivalent terms. The Dockstore GitHub App and a .dockstore.yml file are two components of the same registration method.
Install the Dockstore GitHub App
Installing the GitHub App is simple. Navigate to /my-tools, /my-workflows, /my-notebooks, or /my-services by navigating to My Dashboard then selecting the desired option in the left sidebar. In these screenshots, we will go via /my-tools, but the process is essentially the same for any of the other options.

Click the Register a Tool button on the left hand sidebar.
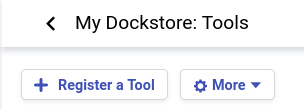
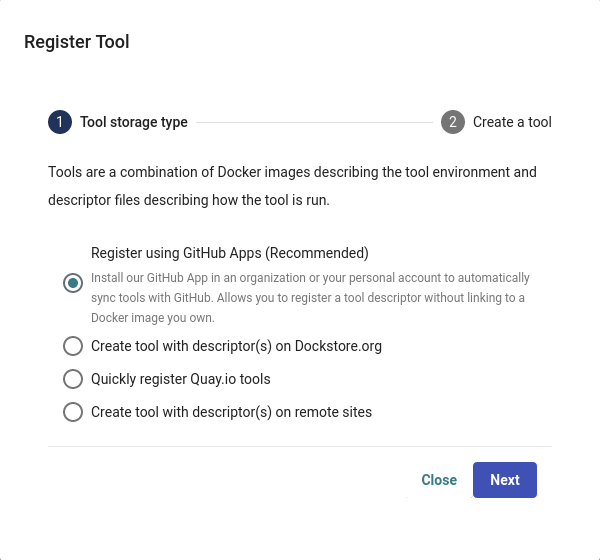
A window will appear asking how you would like to register your tool, workflow, or service. Select Register using GitHub Apps.
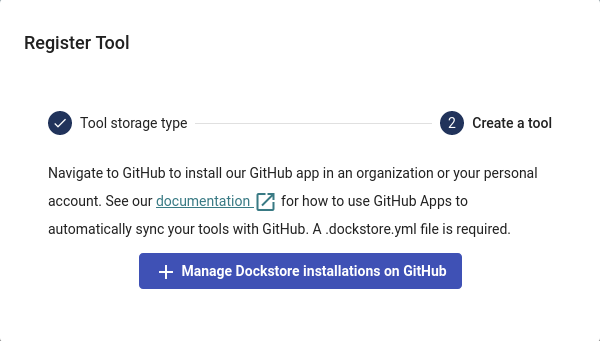
Click + Manage Dockstore Installations on GitHub.
You’ll then be redirected to GitHub where you can install the app in an organization or your personal account. For example, the username for my personal GitHub account is aofarrel. If I want to install the GitHub App so it could access aofarrel/mycoolrepo, I would choose the first option here.
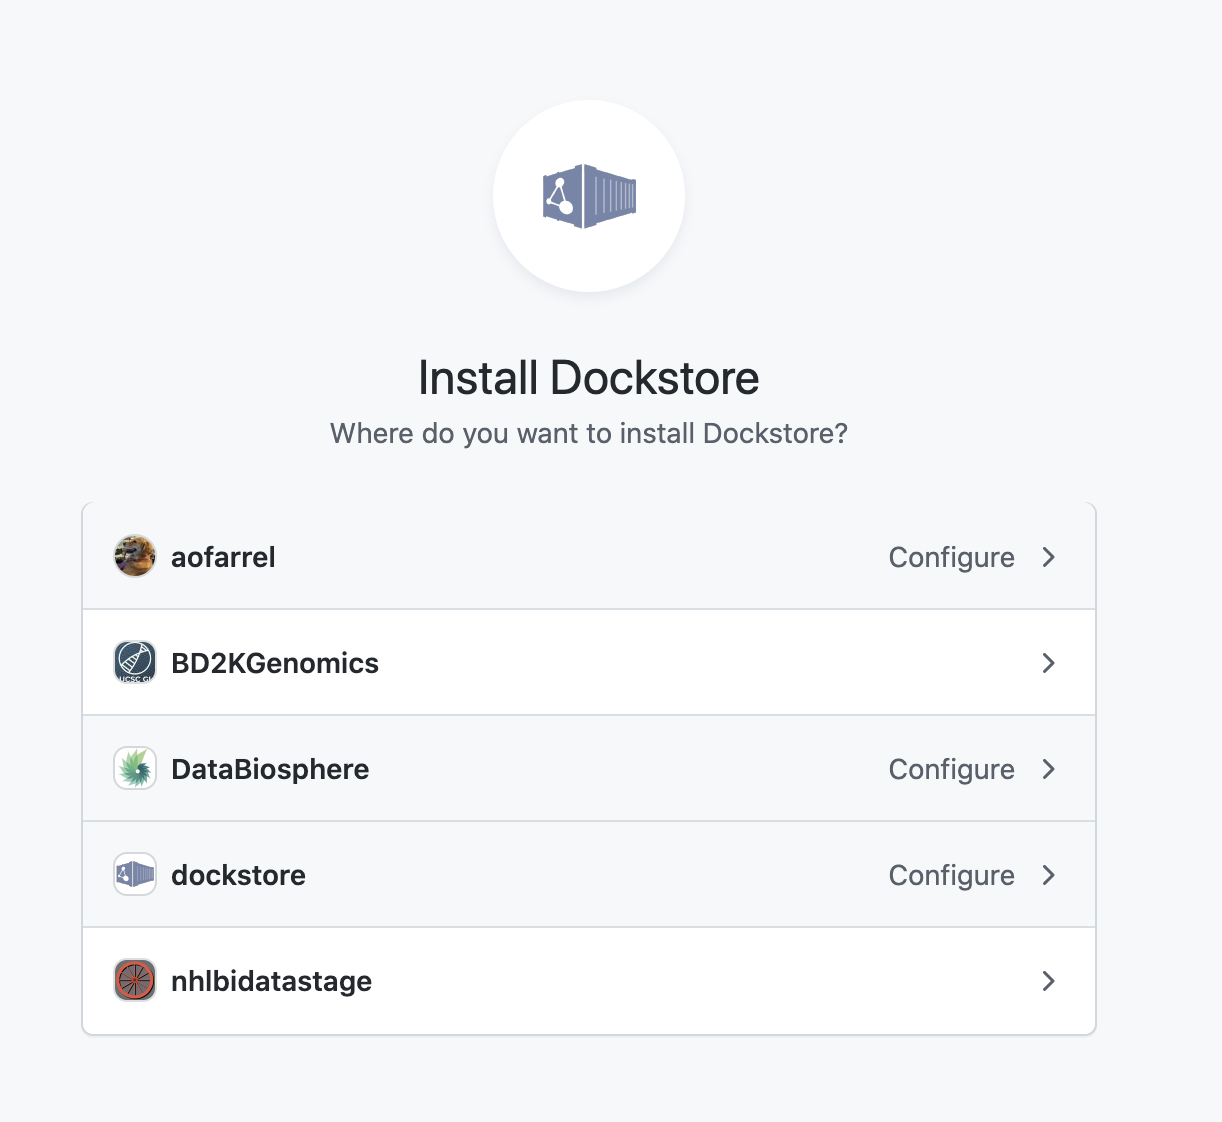
Install our GitHub App in an organization or your personal account
After selection of an organization or a personal account, you can select whether to give access to all current and future repositories or only select ones. If the organization or personal account you choose is intended to be just for Dockstore tools/workflows/services/notebooks, you may want to allow access to all repositories. Otherwise, it may be more intuitive to select only certain repositories. Click save and you will be taken back to Dockstore.
Important
The GitHub user who first adds a workflow onto Dockstore must correspond to a user on Dockstore.
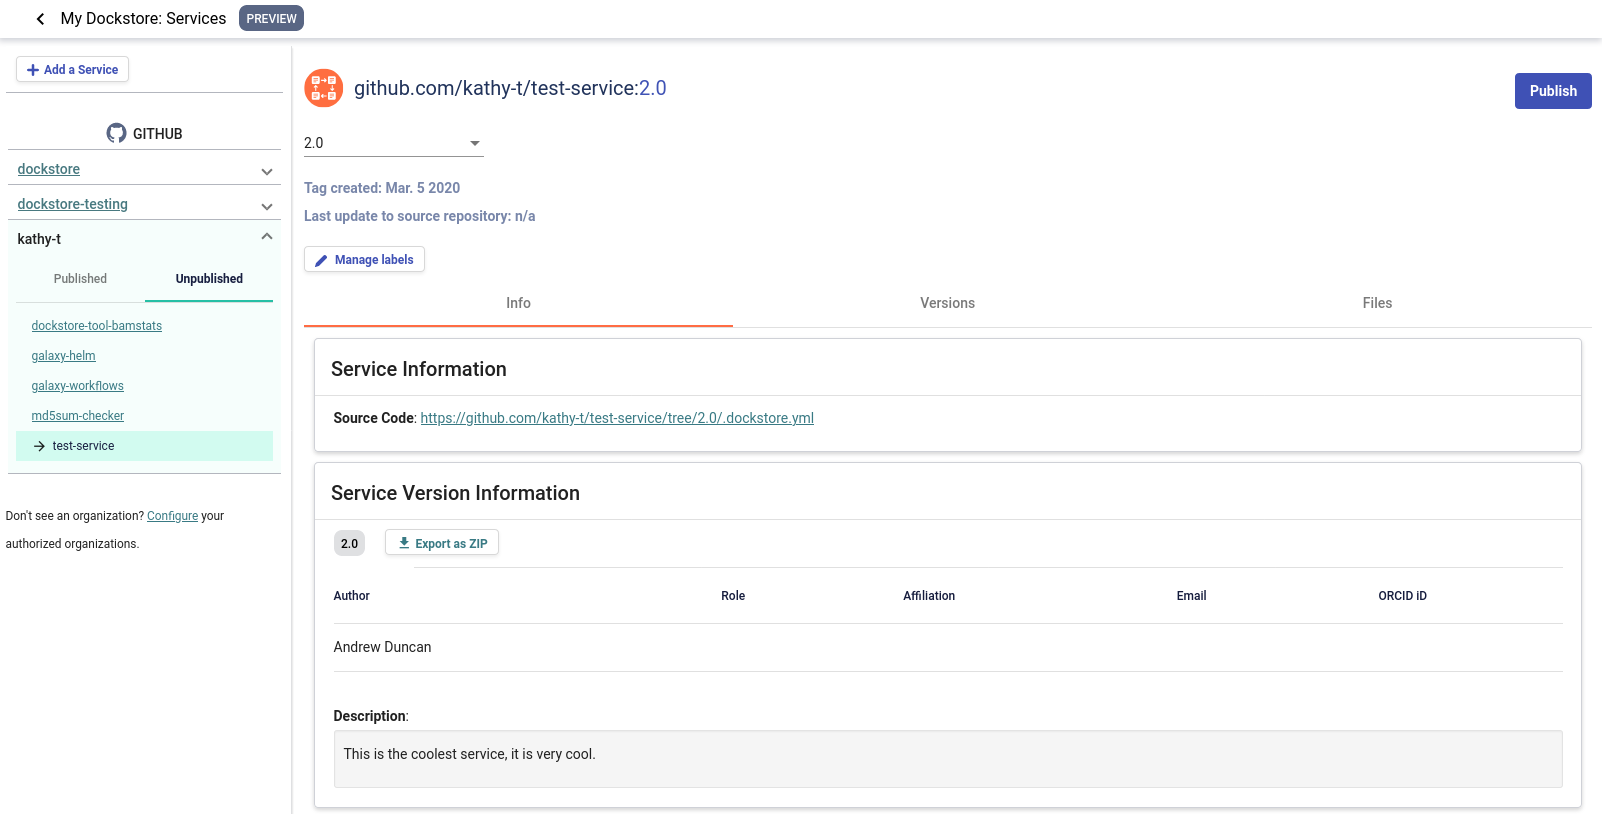
On Dockstore, under the GITHUB section, you should see the names of GitHub accounts that you have access to, such as organizations that you belong to and your personal account. If your repositories that you chose to keep track of contained a .dockstore.yml at the time of installing the GitHub App, then you will see the repositories under the GitHub personal/organization account name that it belongs to. Here’s an example involving /my-services:
A note on permissions when installing the Dockstore GitHub App to a GitHub organization
Only organization admins and repository admins can install the Dockstore GitHub App.
Organization admins will have the easiest time installing the Dockstore GitHub App because they can install it to any repository in the organization on the installation page. Users who are not organization admins can only install the Dockstore GitHub App on repositories that they are an admin of.
For more information on troubleshooting GitHub App permissions, please see this FAQ entry.
See also
Automatic Syncing with GitHub Apps and .dockstore.yml - details on writing a .dockstore.yml file
Migrating Your Existing Workflows - a tutorial on converting already registered workflows
Troubleshooting and FAQ - tips on resolving Dockstore Github App issues.
Ensuring sychronization
Upon installing the GitHub App, Dockstore will find branches in your repository that contain a .dockstore.yml and attempt to register your workflows, tools, services, and notebooks. There may be some cases where Dockstore is unable to find all branches containing a .dockstore.yml, for example, if the GitHub repository has many branches.
If your workflow, tool, service, or notebook is not showing up on Dockstore after 5 minutes, push one additional commit to the branch in your repository that contains the .dockstore.yml that’s not being synchronized. Dockstore will synchronize the branch that was updated, which helps make sure that your workflows, tools, services, and notebooks show up in Dockstore.
If your workflow, tool, service, or notebook still doesn’t show up, check the GitHub App logs to see if Dockstore encountered an error while processing your .dockstore.yml.
Publish Your Notebook
After you register your notebook, you have the option to publish it. To publish your notebook, navigate to its page, and then click the Publish button at upper right.
When you publish your notebook, it becomes visible to the general public via a new “public” page, and other users can star it, add it to a collection, and launch it on various platforms:
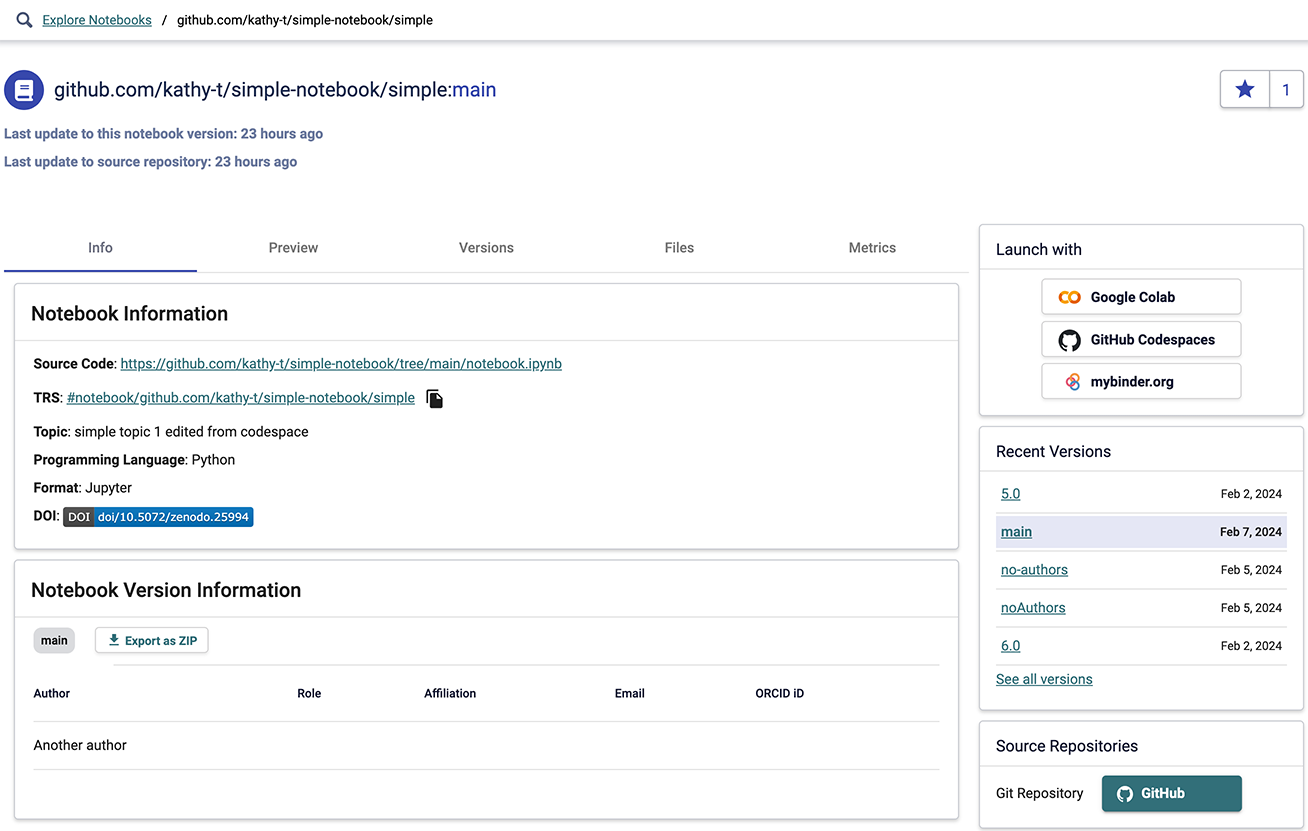
Published notebooks also appear in Search.
Note
After you publish your notebook, although you can archive or unpublish it, you’ll no longer be able to delete it from Dockstore.
Launch Your Notebook
You can launch published Dockstore notebooks to the following environments:
Note
Some of these environments have requirements and quirks that could affect if and how well your notebook will run. For more details, click the above links.
For example, to launch a notebook in Google Colab, navigate to its public page on Dockstore, and click on the Google Colab button on the Launch with panel at upper right:
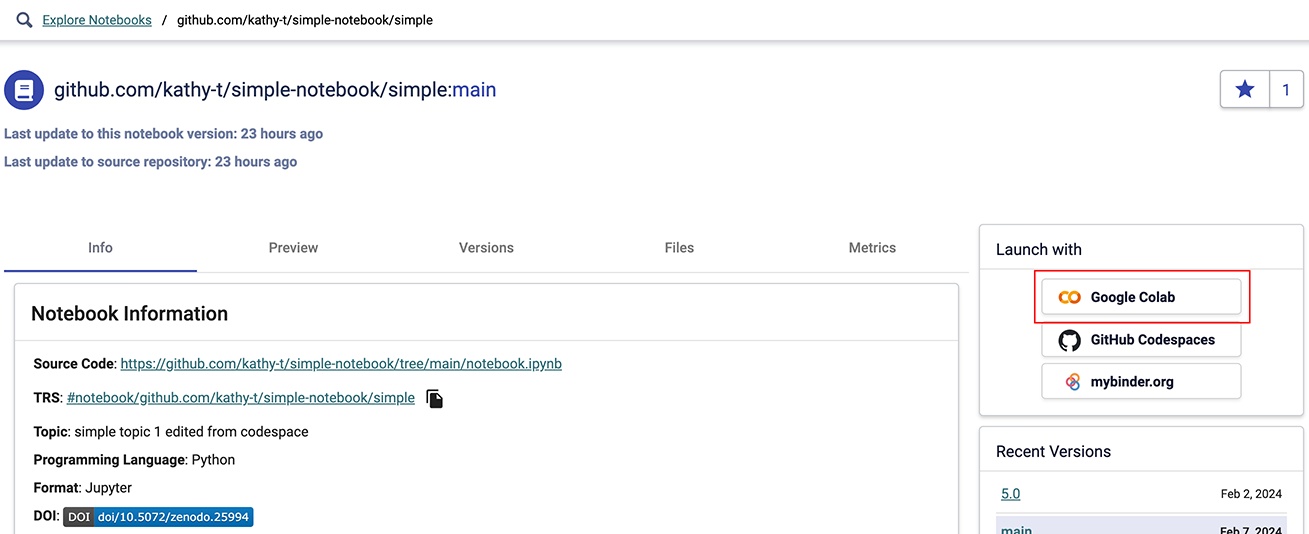
In a new window, the notebook will open in Google Colab. Now, you can edit and run your notebook. If you modify it and want to keep the changes, save it to GitHub, and a few minutes later, the updates will appear on Dockstore.