Getting Started with Docker
Tutorial Goals
This is the first part of our “Getting Started” tutorial series, where we will walk you through the creation of a tool called BAMstats and publish it onto Dockstore. This particular page, “Getting Started with Docker,” will go through the basics of Docker and have you develop a Dockerfile for the BAMstats tool.
This tutorial assumes you have basic knowledge of a Unix-like file system, such as what a working directory is, and how to move between directories on the command line.
Learn about Docker
Learn how to find existing Docker images
Download an existing Docker image from Docker Hub, and
Create a Dockerfile
Use the Dockerfile you created to make a Docker image for a real bioinformatics tool
Create a tag locally
Test your Docker image locally
Introduction to Docker
Note
See Docker Overview for an excellent overview of Docker.
There is a good chance that you have heard of containerization. A container is essentially an emulated filesystem that bundles up some kind of software. It’s similar to a virtual machine, but is usually much lighter on system resources, because a container (unlike a VM) does not need to run an extra operating system.
Docker is a well-known type of containerization software. It provides a fast environment for both users and developers. A developer can package software and its dependencies into an Docker image, and then share that Docker image with users. Users who download your Docker image and run it with the Docker program will be able to run the software you packaged without having to handle the installation of your program’s prerequisites or anything else; it’s ready to go as-is.
When a user runs a Docker image locally, the Docker Engine spins up an instance of the Docker image. This instance is called a Docker container. You can think of an image as a template, and a container as something made from that template. Note that the filesystem of a Docker container is sequestered from the rest of your computer, so you will either want the container to already have any extra files you might need, or get those files into the Docker container by “mounting” them. We will briefly talking about how to mount files in this tutorial, but keep in mind that workflow languages handle this for us automatically, as will be shown in Getting Started with Nextflow, Getting Started with CWL, and Getting Started with WDL. But we don’t always need to mount files: when we talk about how to create a Dockerfile, you will learn how to create a Docker image that already has the files you need – whether it’s a simple 3 line Python script saved as a text file, or a complicated compiled program with lots of prerequisites.
Docker is a robust piece of software with dozens of features. We won’t be going over everything in this tutorial, but we will give you the overview needed to use Docker in the context of tools and workflows.
Where can I run Docker?
Most 64-bit systems can run Docker. Your local Windows/Mac/Linux machine can likely run it, and most cloud compute systems have support for Docker or similar software too.
Users of HPC (High Performance Compute) systems may not be able to run Docker Engine directly, depending on your sysadmin’s policies and the details of your HPC’s scheduling system. We can’t go over all of possible HPC setups here, but we recommend checking out Singularity and Shifter, both of which are designed for running Docker images without using the Docker Engine program. If your HPC does not support Docker Engine, there is a strong chance it is already set up with an alternative.
How do I install Docker?
Docker generally recommends that people install it via Docker Desktop. Docker Desktop includes the command line Docker Engine program that we will be using in this tutorial, plus a GUI to make adjustment of certain settings a little easier, and a quick tutorial for new users (which we recommend you try out!). Linux users have the option of using either Docker Desktop, or using a package manager to solely install Docker Engine.
For the sake of simplicity, this tutorial will assume you are running Docker on a non-HPC Ubuntu machine. Although installation can vary across operating systems, the actual tutorial instructions we use here work almost identically across different operating systems running Docker.
Using existing Docker images
Sometimes, the tool you want to run is already Dockerized. Perhaps you want to use that existing image for your own research, or maybe you want to base a pipeline off it. But how would you know that such an image exists? Where do you look for Docker images? And how do you know if you’ve found a good one?
Container registries
Docker images are usually shared on registries. Quay.io and Docker Hub are examples of popular public registries, which anyone can browse online. GitLab Container Registry on the other hand is a private registry, so it can’t be easily browsed by outside users.
Container registries usually show you the layers that make up a particular Docker image, what versions are available, and the username or organization that the Docker image is associated with. They also usually give you the command line text you need to use in order to download a particular image locally, which will allow you use to the image on your own machine.
Note
Different registries have different limits on how often you can download images from the command line. If you are not logged in with the service you are using, these limits are usually based upon IP address, and may start blocking you from downloading if you are doing it too many times in a short period of time. As of our writing this, Docker Hub in particular limits your IP to 100 downloads per six hours if you are not logged in.
Looking for an official image
A good place to start when looking for Docker images (or for one to base your own Docker image upon) are official images maintained by institutions. Docker Hub makes this easy by maintaining a curated list of official images, and a curated list of verified images maintained by commerercial entities. These images include the likes of Ubuntu, golang, the AWS CLI, and even Docker. Yes, you can run Docker in Docker!
Quay.io does not maintain a list of official images like Docker Hub, but you can nonetheless find official images on there with a bit of searching, such as CentOS. Because Quay is owned by Red Hat, it is a good place to find images based on Red Hat Linux distributions.
Looking for an oft-maintained image
Official images are generally well-maintained. By this we mean that they get frequent updates. Most Docker registries will show you the last time an image was updated, and will show a history going back several updates. This is important not only because it means you can get the latest features of new versions of software, but it also usually indicates that someone is paying attention to the security side of things too. No one wants to use a container only to discover that it still contains the infamous log4j vulnerability, after all.
Security considerations
Note
Containers operate in an isolated filesystem, and you can generally do whatever you like inside of them without affecting the rest of the system. However, it is theoretically possible for malicious software in a container to “escape” into the system at large.
How does one make sure that their images are secure? Even if you think that your research is not a high-value target for hackers, your system might still be useful to someone hoping to mine cryptocurrency, steal credentials, or operate a botnet. Whether you make your own images or use existing ones, there are several things you can do to help keep yourself and your users safe from malicious software. See Image / Container Best Practices for more information.
Thick vs thin Docker images
Docker images are sometimes described in terms of thick versus thin/slim, describing how much stuff is inside them. These are relative terms, not a precise definition, but they can be useful shorthands for two different schools of thought around Docker: Including a single tool, or multiple tools.
Over time, we at Dockstore have found that slim Docker images, those with single tools installed in them, are more helpful for extending and building new workflows with. That being said, thick Docker containers, which include multiple tools and even full workflows with frameworks like SeqWare or Galaxy, can have their place as well. Projects like the ICGC PanCancer Analysis of Whole Genomes (PCAWG) made use of thick Docker containers that had complex workflows that fully encapsulated alignment and variant calling. Another example is the UWGAC Analysis Workflows, which all use the same Docker image full of R scripts in order to preform everything from file conversion to a full GWAS analysis. The self-contained nature of these Docker containers allow for mobility between a wide variety of environments, and sometimes simplify the setup of these pipelines across a wide variety of HPC and cloud environments. Either approach works for the Dockstore so long as you can describe the tool or workflow inside the Docker container as a CWL/WDL/NFL-defined tool (which you can for most things).
Tutorial: Downloading and running an existing Docker image
Finding an official image
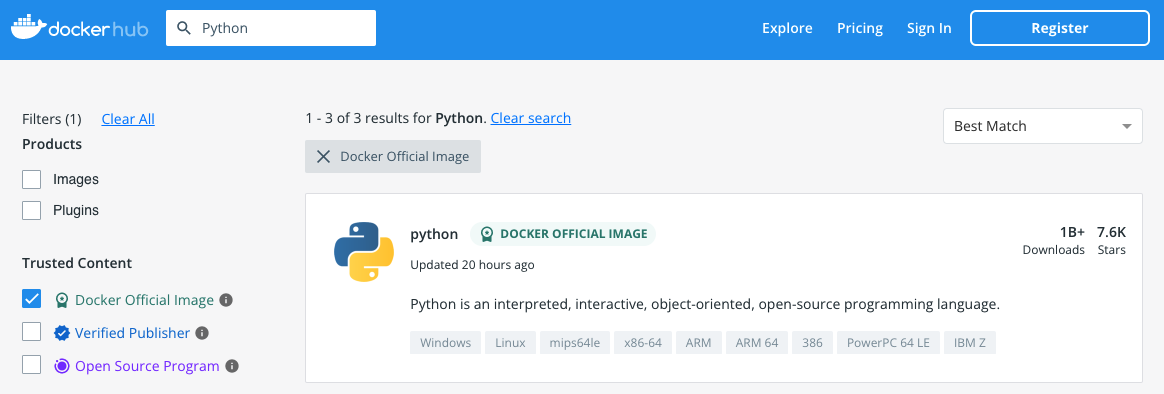
Let’s start with Docker Hub. From the homepage, we can click “Explore” in the top righthand corner in order to get to the search page, allowing us to start digging through all of its images. Don’t worry, it won’t load all 9,200,012 images at once.
First, let’s click the “Docker Official Image” option on the left, then search “Python” using the search bar at the top. Fittingly, our top result is the official Python image.
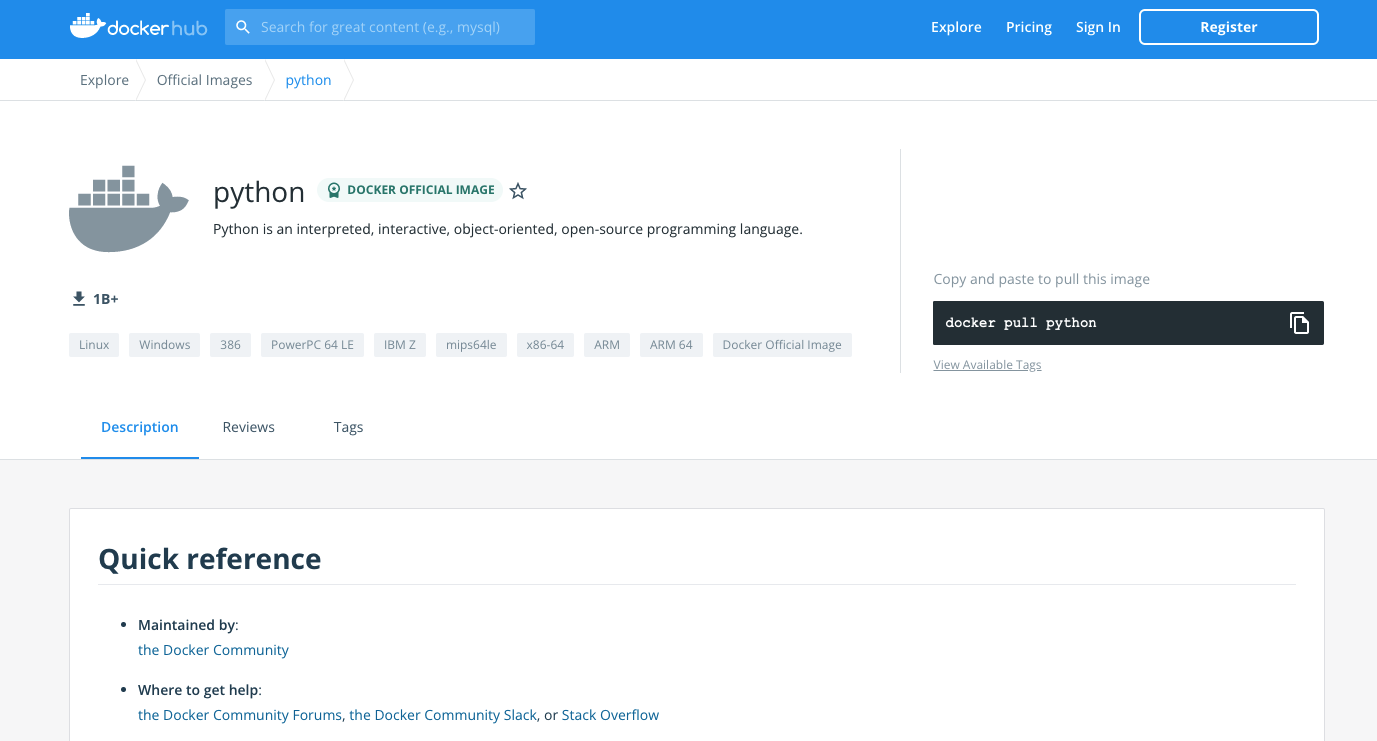
Upon clicking on that result, we are taken to a description page. There is a lot of information here, such as an explanation of the multiple variants of the image. But what we’re interested in right now is the command in the black box towards the top right. Assuming you have installed Docker already – now is a good time to do that – this is the command used to pull the image from Docker Hub’s servers into your computer, allowing you to execute it locally.
Let’s try that next!
Downloading an image from Docker Hub
Once Docker is installed, open up the command line and enter the following:
$> docker pull python
The response will, at first, look a bit like this:
Using default tag: latest
latest: Pulling from library/python
e756f3fdd6a3: Pull complete
bf168a674899: Pull complete
e604223835cc: Pull complete
6d5c91c4cd86: Extracting [>                                                  ]  557.1kB/54.58MB
2cc8d8854262: Downloading [========================================>          ]  159.8MB/196.7MB
2767dbfeeb87: Download complete
9d5e973c5e10: Download complete
45f2aca7694f: Download complete
1123e010bf80: Download complete
This shows the progress of downloading each layer included in the image, one at a time, plus extracting them. Once a layer is downloaded and extracted, it will read “Pull complete” in the CLI. This whole process usually takes just a few minutes (depending on the speed of your internet connection). In this case, it creates the Python Docker image.
Once everything has downloaded and been extracted, you will see something like:
Using default tag: latest
latest: Pulling from library/python
e756f3fdd6a3: Pull complete
bf168a674899: Pull complete
e604223835cc: Pull complete
6d5c91c4cd86: Pull complete
2cc8d8854262: Pull complete
2767dbfeeb87: Pull complete
9d5e973c5e10: Pull complete
45f2aca7694f: Pull complete
1123e010bf80: Pull complete
Digest: sha256:b7bfea0126f539ba570a01fb595ee84cc4e7dcac971ad83d12c848942fa52cb6
Status: Downloaded newer image for python:latest
docker.io/library/python:latest
Note
The name of each layer, the number of layers, the size of each layer and the overall image, and the sha256 digest that are written down here are likely to be different for you. Because we did not specify a tag when we pulled the container, Docker defaulted to looking for the latest tag, which is frequently updated.
Running a Docker image locally
Now, let’s see what this image can do! Use this command to actually run the image as a container:
docker run -it python
Don’t forget to include the -it – it is necessary to run the container in interactive mode. Without this, this Python container will simply open, then immediately close itself.
What we see next is the Python 3 command line. Exactly what version of Python 3 will depending on what’s on the latest tag when you run this tutorial, but for us, it is currently Python 3.10.5. If we ask the interpreter to print some text, it will do this task dutifully.
Python 3.10.5 (main, Jun  7 2022, 18:39:11) [GCC 10.2.1 20210110] on linux
Type "help", "copyright", "credits" or "license" for more information.
>>> print("hello world")
hello world
Feel free to type in whatever Python code you would like - but keep in mind the filesystem is separated from the rest of your computer, so file IO may not work quite as you would expect).
This separated filesystem is actually one of the advantages of Docker. It offers you a relatively secure sandbox where you can test programs without breaking your filesystem. If you paste the following code into the Dockerized Python interpreter, you can all the fun of recursively pasting an internet meme into every subdirectory with none of the long-term consequences!
Warning
Although not really malicious, this code can be very annoying to clean up after, and has a chance to break things if it gets into system-managed folders. Don’t run this outside of a Docker image!
import subprocess
import shutil
import os
import sys
subprocess.check_call([sys.executable, "-m", "pip", "install", "requests"])
import requests

res = requests.get("https://pbs.twimg.com/media/EfKADlvWAAE7P0p?format=jpg&name=small", stream = True)
if res.status_code == 200:
    counter = 0
    for x in os.walk("."):
        try:
            with open("%s/wow.jpg" % x[0], 'wb') as meme:
                shutil.copyfileobj(res.raw, meme)
                counter += 1
        except OSError:
            pass
    print("Wrote image %s times." % counter)
else:
    print("Darn... they're onto us.")
When you are finished decorating your Docker container with pictures of dogs, you can exit the running container using exit() or quit(). This will take you back to your “real” filesystem, which will not have wow.jpg in every subdirectory.
Note
Many images take in bash commands, instead of running a Python interpreter. In that case, use the bash exit command to quit the container.
A stopped container still exists on your hard disk, although it is usually very small. You can delete all stopped containers using the command docker container prune. If you want to remove all Docker images on the other hand, and you have no containers running at the moment, you can use the command docker rmi $(docker images -q).
What if I want to make my own image?
Perhaps, instead of using someone else’s software, you want to containerize your own. Or, maybe you need to work with the same files every time in a certain Docker container, and you do not wish to keep mounting the same files into your container every time you launch it. Let’s walk through how to generate your very own Docker image using a Dockerfile.
Thick vs thin Docker images
Docker images are sometimes described in terms of thick versus thin/slim, describing how much stuff is inside them. These are relative terms, not a precise definition, but they can be useful shorthands for two different schools of thought around Docker: Including a single tool, or multiple tools.
Over time, we at Dockstore have found that slim Docker images, those with single tools installed in them, are more helpful for extending and building new workflows with. That being said, thick Docker containers, which include multiple tools and even full workflows with frameworks like SeqWare or Galaxy, can have their place as well. Projects like the ICGC PanCancer Analysis of Whole Genomes (PCAWG) made use of thick Docker containers that had complex workflows that fully encapsulated alignment and variant calling. Another example is the UWGAC Analysis Workflows, which all use the same Docker image full of R scripts in order to preform everything from file conversion to a full GWAS analysis. The self-contained nature of these Docker containers allow for mobility between a wide variety of environments, and sometimes simplify the setup of these pipelines across a wide variety of HPC and cloud environments. Either approach works for the Dockstore so long as you can describe the tool or workflow inside the Docker container as a CWL/WDL/NFL-defined tool (which you can for most things).
Tutorial: Making a Dockerfile for the BAMstats tool
Create a new repository
See the dockstore-tool-bamstats repository on GitHub which we created as an example. This is linked to the Quay.io repository at dockstore-tool-bamstats.
For the rest of this tutorial, you may wish to work in your own repository with your own tool or “fork” the repository above into your own GitHub account.
With a repository established in GitHub, the next step is to create the Docker image with BAMStats correctly installed.
Create a Dockerfile
We will create a Docker image with BAMStats and all of its dependencies
installed. To do this we must create a Dockerfile. Here’s a sample
Dockerfile:
#############################################################
# Dockerfile to build a sample tool container for BAMStats
#############################################################

# Set the base image to Ubuntu
FROM ubuntu:14.04

# File Author / Maintainer
MAINTAINER Brian OConnor <briandoconnor@gmail.com>

# Setup packages
USER root
RUN apt-get -m update && apt-get install -y wget unzip openjdk-7-jre zip

# get the tool and install it in /usr/local/bin
RUN wget -q https://downloads.sourceforge.net/project/bamstats/BAMStats-1.25.zip
RUN unzip BAMStats-1.25.zip && \
    rm BAMStats-1.25.zip && \
    mv BAMStats-1.25 /opt/
COPY bin/bamstats /usr/local/bin/
RUN chmod a+x /usr/local/bin/bamstats

# switch back to the ubuntu user so this tool (and the files written) are not owned by root
RUN groupadd -r -g 1000 ubuntu && useradd -r -g ubuntu -u 1000 ubuntu
USER ubuntu

# by default /bin/bash is executed
CMD ["/bin/bash"]
This Dockerfile has a lot going on in it. There are good tutorials online about the details of a Dockerfile and its syntax. An excellent resource is the Docker website itself, including the Best practices for writing Dockerfiles webpage. We’ll highlight some sections below:
FROM ubuntu:14.04
This uses the ubuntu 14.04 base distribution. How do we know to use
ubuntu:14.04? This comes from either a search on Ubuntu’s home page
for their “official” Docker images, or you can simply go to
DockerHub or Quay and
search for whatever base image you like. You can extend anything you
find there. So if you come across an image that contains most of what
you want, you can use it as the base here. Just be aware of its source:
Many people tend to stick with “official”, basic images for security reasons.
MAINTAINER Brian OConnor <briandoconnor@gmail.com>
You should include your name and contact information.
USER root
RUN apt-get -m update && apt-get install -y wget unzip openjdk-7-jre zip
RUN wget -q https://downloads.sourceforge.net/project/bamstats/BAMStats-1.25.zip
RUN unzip BAMStats-1.25.zip && \
    rm BAMStats-1.25.zip && \
    mv BAMStats-1.25 /opt/
This switches to the root user to perform software installs. It
downloads BAMStats, unzips it, and installs it in the correct location,
/opt.
This is one of the main advantages of Docker. On some systems the above process might take days or weeks of working with a sysadmin to install dependencies. Instead of installing dependencies on every machine someone might want to run a workflow/tool on, we can create a Docker image that wraps that workflow/tool. With Docker, we only need to correctly configure the environment and dependencies for a program once, and once that Docker image is set up, we avoid repeating that process. All we need to do is transfer that Docker image to other machines, and they will be able to run what’s inside it. This greatly simplifies the process for other users.
COPY bin/bamstats /usr/local/bin/
RUN chmod a+x /usr/local/bin/bamstats
This copies the local helper script bamstats from the git checkout
directory to /usr/local/bin. (We’ll talk more about that helper script later.) This is an important example; it shows
how to use COPY to copy files in the git directory structure to
inside the Docker image. After copying to /usr/local/bin we make the helper script executable by all users in the next line via chmod which is used to modify permissions in Unix-like systems.
RUN groupadd -r -g 1000 ubuntu && useradd -r -g ubuntu -u 1000 ubuntu
USER ubuntu

# by default /bin/bash is executed
CMD ["/bin/bash"]
The user ubuntu is created and switched to in order to make file
ownership easier, and the default command for this Docker image is set to
/bin/bash which is a typical default. bash is the command line interpreter that most Unix-like systems use, so we essentially say that by default this Docker image will allow the user to directly interact with it using bash commands.
An important thing to note is that this Dockerfile only scratches
the surface. Take a look at Best practices for writing
Dockerfiles
for an in-depth look at writing Dockerfiles.
Read more on the development process at https://docs.docker.com. For information on building your Docker image on Quay.io we recommend their tutorial.
Build a Docker Image
Now that you’ve created the Dockerfile, the next step is to build the image. Install Docker Engine or Docker Desktop if you have not done so already. Once it is installed, you can use this command to build your Docker image:
$> docker build -t quay.io/collaboratory/dockstore-tool-bamstats:1.25-6 .
The . is the path to the location of the Dockerfile, which is in the
same directory here. The -t parameter is the “tag” that this Docker
image will be called locally when it’s cached on your host. A few things
to point out: the quay.io part of the tag typically denotes that
this was built on Quay.io (which we will see in a later section). I’m
manually specifying this tag so it will match the Quay.io-built version.
This allows me to build and test locally then, eventually, switch over
to the quay.io-built version. The next part of the tag,
collaboratory/dockstore-tool-bamstats, denotes the name of the tool
which is derived from the organization and repository name on Quay.io.
Finally 1.25-6 denotes a version string. Typically, you want to sync your version string with releases on GitHub.
The tool should build normally and should exit without errors. You should see something like:
Successfully built 01a7ccf55063
It might have a different name than 01a7ccf55063 but it should be a success regardless. Check that the tool is now in your local Docker image cache:
$> docker images | grep bamstats
quay.io/collaboratory/dockstore-tool-bamstats   1.25-6  01a7ccf55063   2 minutes ago   538.3 MB
Great! This looks fine!
Testing the Docker Image Locally
OK, so you’ve built the image and created a tag. Now what?
The next step will be to test the tool directly via Docker to ensure
that your Dockerfile is valid and correctly installed the tool. If
you were developing a new tool, there might be multiple rounds of
docker build, followed by testing with docker run before you get
your Dockerfile right.
This command will execute the Docker image we just made, launching it as a container. If you wish to run this yourself, make sure you launch on a host with at least 8GB of RAM and dozens of GB of disk space:
$> docker run -it -v `pwd`:/home/ubuntu --user `echo $UID`:1000 quay.io/collaboratory/dockstore-tool-bamstats:1.25-6 /bin/bash
Note
This command expects your UID to be 1000. If it is not, you need to add --user <your-id>:1000.
You’ll be dropped into a bash shell which works just like the Linux
environments you normally work in. We will come back to what -v is
doing in a bit. The goal now is to exercise the tool and make sure it
works as you expect. BAMStats is a very simple tool and generates some
reports and statistics for a BAM file. Let’s run it on some test data
from the 1000 Genomes project:
# this is inside the running Docker container
$> cd /home/ubuntu
$> wget ftp://ftp.1000genomes.ebi.ac.uk/vol1/ftp/phase3/data/NA12878/alignment/NA12878.chrom20.ILLUMINA.bwa.CEU.low_coverage.20121211.bam
# if the above doesn't work here's an alternative location
$> wget https://s3.amazonaws.com/oconnor-test-bucket/sample-data/NA12878.chrom20.ILLUMINA.bwa.CEU.low_coverage.20121211.bam
$> /usr/local/bin/bamstats 4 NA12878.chrom20.ILLUMINA.bwa.CEU.low_coverage.20121211.bam
What’s really going on here? The bamstats command above is a simple script someone wrote to make it easier to call BAMStats. This is the same helper script we mentioned earlier when writing the Dockerfile. This is what the COPY command copied into the Docker image via the Dockerfile.
Here’s the helper script’s contents:
#!/bin/bash
set -euf -o pipefail

java -Xmx$1g -jar /opt/BAMStats-1.25/BAMStats-1.25.jar -i $2 -o bamstats_report.html -v html
zip -r bamstats_report.zip bamstats_report.html bamstats_report.html.data
rm -rf bamstats_report.html bamstats_report.html.data
You can see it just executes the BAMStats jar - passing in the GB of memory and the BAM file while collecting the output HTML report as a zip file followed by cleanup.
Note
Notice how the output is written to whatever the current directory is. This is the correct directory to put your output in since the CWL tool described later assumes that outputs are all located in the current working directory that it executes your command in.
Let’s take another look at the docker run command. The -v parameter is mounting the current working
directory into /home/ubuntu which was the directory we worked in
when running /usr/local/bin/bamstats above. The net effect is when
you exit the Docker container (with command exit or pressing
ctrl + d), you’re left with a bamstats_report.zip file in the
current directory. This is a key point: It shows you how files are
retrieved from inside a Docker container.
You can now unzip and examine the bamstats_report.zip file on your
computer to see what type of reports are created by this tool. For
example, here’s a snippet:
Sample report
Rather than interactively working with the image, you could also run your Docker image from the command line.
$> wget ftp://ftp.1000genomes.ebi.ac.uk/vol1/ftp/phase3/data/NA12878/alignment/NA12878.chrom20.ILLUMINA.bwa.CEU.low_coverage.20121211.bam
$> docker run -w="/home/ubuntu" -it -v `pwd`:/home/ubuntu --user `echo $UID`:1000 quay.io/collaboratory/dockstore-tool-bamstats:1.25-6 bamstats 4 NA12878.chrom20.ILLUMINA.bwa.CEU.low_coverage.20121211.bam
Next Steps
You could stop here! However, we currently lack a standardized way to describe how to run this tool. That’s what descriptor languages and Dockstore provide. We think it’s valuable, and there’s an increasing number of tools and workflows designed to work with various descriptor languages. To that end, we have continued this tutorial to describe how the command line programs and input files can be parameterized and constructed via a descriptor language.
There are several descriptor languages available on Dockstore. Follow the links to get an introduction.