Note
This document assumes you have basic knowledge of what Docker is, and have access to a system that can run Docker. It is recommended, but not required, that you complete Getting Started With Docker before this tutorial.
Getting Started with WDL
Tutorial Goals
Learn about the Workflow Description Language (WDL)
Create a basic WDL workflow which uses a Docker image
Run the workflow locally
Describe a sample parameterization of the workflow
Push the workflow onto GitHub
Describe Your Workflow in WDL
Workflow Description Language, usually referred to as WDL (“widdle”), is a workflow language with a task section and a workflow section. Like CWL, each task in a WDL workflow can take place in an instance of a Docker image. Terra maintains documentation on WDL, but we will go over the basics here. A simple WDL might look something like this:
version 1.0

task hello {
  input {
    String name
  }

  command {
    echo 'hello ${name}!'
  }

  output {
    File response = stdout()
  }

  runtime {
   docker: 'ubuntu:impish-20220105'
  }
}

workflow test {
  call hello
}
The runtime section of a task allows you to use a Docker image to run the task in. In this example we use the basic Ubuntu image, the one associated with Ubuntu 21.10 to be specific.
Note
On Dockstore, a one-task WDL with an associated Docker image can be registered as a WDL Tool. However, unlike CWL, WDL does not directly have the concept of a Tool built into it, instead, “WDL Tools” are a Dockstore-only concept which exists for legacy reasons. We are gradually moving away from WDL Tools and encourage people to register their WDLs, whether they be single-task or not, as workflows. WDL workflows can use Docker images, as will be seen in this tutorial.
We provide an example from the wdl-bamstats repository:
version 1.0

task bamstats {
    input {
        File bam_input
        Int mem_gb
    }

    command {
        /usr/local/bin/bamstats ${mem_gb} ${bam_input}
    }

    output {
        File bamstats_report = "bamstats_report.zip"
    }

    runtime {
        docker: "quay.io/collaboratory/dockstore-tool-bamstats:1.25-7"
        memory: mem_gb + "GB"
    }
}

workflow bamstatsWorkflow {
    input {
        File bam_input
        Int mem_gb
    }

    call bamstats { input: bam_input=bam_input, mem_gb=mem_gb }

    meta {
        author: "Andrew Duncan"
        email: "andrew@foobar.com"
        description: "## Bamstats \n This is the Bamstats workflow.\n\n Adding documentation improves clarity."
    }
}
Let us break it down piece by piece.
Note
The very first line represents the version of WDL specification being used. In this example, we are using version 1.0 of the WDL spec. If this line is not included at the top of the WDL, the WDL will be parsed as if it were following the draft-2 specification. Note that most 1.0 WDLs and draft-2 WDLs are not interchangable without a few changes, so make you are using the correct version when following along with examples.
You’ll notice that there are two main sections of the file. First is a task section where we define the task level inputs and outputs of a given step, along with the runtime attributes. You can have multiple task sections in a WDL, as each one represents a single step. Next, there is a workflow section where we define workflow level inputs and outputs, and the calling of the task(s).
Task
Task Inputs
At the top of the task section we define two inputs: the input bam file and the amount of memory in GB to use to run the task. This looks very similar to variable declaration in most programming languages. To the left is the type of the variable, and to the right is its name.
input {
  File bam_input
  Int mem_gb
}
In WDL, you can make a variable optional by adding a ? to the end of the
type declaration. If a ? is not included then the variable is considered
required. So, because this says File and not File? then we know that
bam_input must be defined for the pipeline to work. The same goes for
mem_gb too.
Task Command
Next is the command section. This specifies what command we want to run on the command line. Usually, it is written like a Bash script. We won’t be going over all the details of using Bash, but if you are running scientific workflows on the command line already, you will find this part of WDL quite familiar.
We can also pass the command parameters based on the inputs described above. Here we pass the amount of memory to use and the input BAM file to a script from the quay.io/collaboratory/dockstore-tool-bamstats:1.25-6_1.0 Docker image. Note that bamstats requires you pass in the memory as a positional argument, but other programs may not require this.
When referencing variables from the input section in the command section, you generally refer to them using a dollar sign and curly braces.
command {
    /usr/local/bin/bamstats ${mem_gb} ${bam_input}
}
Sometimes, you will see command sections defined using <<<three chevrons>>> rather than {curly braces}. In that scenario, variables are referenced a little differently, using tildes (~) instead of dollar signs. This version can be helpful when dealing with complicated Bash commands, because using ${this} method to reference your task’s input variables will sometimes cause conflicts with other uses of $ and {curly braces} that Bash natively supports. For simple workflows like this, it does not matter which one we use. If we had chosen to write our command in the chevron syntax, it would look like this instead:
command <<<
    /usr/local/bin/bamstats ~{mem_gb} ~{bam_input}
>>>
Task Outputs
The output section defines the expected output for the task. Here the output is a zip file containing the results of the script. In this case, we know bamstats creates an output with the filename “bamstats_report.zip” so we set that as our output.
output {
    File bamstats_report = "bamstats_report.zip"
}
What if we did not know what the output file name would be, but we knew it had to
be a zip file? Situations like this can happen if a program you are running in WDL
sets an output name that is based upon the name of the input. That’s not the case with
bamstats, but it is very common, so it’s worth taking a look at how this can be done.
Assuming there are no other zip files lying around in the Docker container’s
execution directory, we can define our WDL to instead look for any zip files
using WDL’s glob() feature. glob() returns an array of files matching a
regular expression string. Note that it will still be considered an array even
if it only has one file in it. So, we could do…
output {
    Array[File] bamstats_report = glob("*.zip")
}
In this example, there is only zip file in the execution directory, so the array will only consist of one file (“bamstats_report.zip”). Arrays in WDL are indexed starting with zero, so we know that an array with only one file in it is going to have that file at index zero. With that knowledge, this is also an option:
output {
    File bamstats_report = glob("*.zip")[0]
}
This is a useful trick for multi-step workflows, where it is often easier
to deal with a variable of type File than of type Array[File].
Task Runtime
The runtime section is very important. It is here where we define what Docker
image to use to run the task in. We also define how much memory the Docker
container should use. There are other arguments we could put here, such as
using the disks argument to indicate how much disk space should be
allocated for the task, but we will keep it simple for now.
Note
Some WDL execution engines will ignore certain things in the runtime section, depending what kind of backend you are running on. For example, the Google Cloud-specific preemptible (which we do not include in this bamstats WDL, but is sometimes used in workflows) would be ignored if you are running on AWS.
runtime {
    docker: "quay.io/collaboratory/dockstore-tool-bamstats:1.25-7"
    memory: mem_gb + "GB"
}
Workflow
The workflow section here consists of two main parts. The first section is an input section, where we define the input BAM file and the memory to use. In our case, because we only have one task, it is identical to the inputs of that one task.
input {
    File bam_input
    Int mem_gb
}
Next, there is the call section where we actually call the tasks. Without this section our workflow will not do anything. In this section we call the bamstats task, and pass it the two required parameters.
call bamstats {
    input:
        bam_input=bam_input,
        mem_gb=mem_gb
}
Note that we could have also written it as:
call bamstats {
input:
bam_input=bam_input,
mem_gb=mem_gb
}
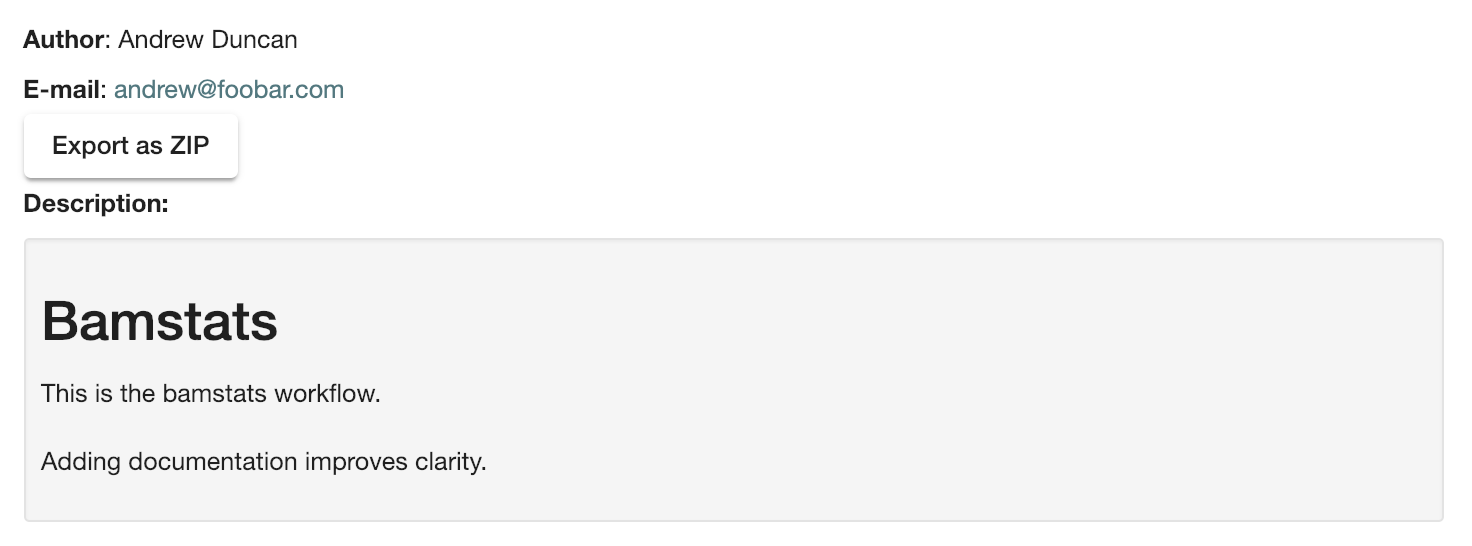
Finally, we have a metadata section where we can store key value pairs. It is free-form, so we could put anything here. Dockstore is able to pick up author, email, and description if they are defined here. All metadata values must be a single-line string.
Note
If no description is defined in the descriptor file, the README from the corresponding Git repository is used.
The description field can be used to add documentation, which Dockstore will render with markdown formatting. When writing a description in markdown that requires newlines, specify the newlines with \n
Below we show an example metadata section and how it will display on your workflow’s landing page:
meta {
    author: "Andrew Duncan"
    email: "andrew@foobar.com"
    description: "## Bamstats \n This is the Bamstats workflow.\n\n Adding documentation improves clarity."
}
Testing Locally
So at this point, you’ve created a Docker-based workflow and have described how to call that workflow using WDL. Let’s test running bamstats using the Dockstore command line and descriptor. This will test that the WDL correctly describes how to run your workflow.
Setting Up the Dockstore CLI
We will be using the Dockstore CLI, which includes a version of the widely-used WDL executor Cromwell, to run WDL workflows on our local machine. With that in mind, the first thing to do is setup the Dockstore CLI locally. This will have you install all of the dependencies needed to run the Dockstore CLI on your local machine.
The workflow we are writing today does not use scattered tasks, but scattered tasks are common in more advanced workflows. This is excellent for parallelization in the cloud, but it is not optimized for running locally, so sometimes running scattered tasks on a local machine will cause issues due to the scattered tasks overloading your machine’s resources. The easiest way to avoid these issues is to follow our instructions on setting up a Cromwell configuration file that provides a concurrent-job-limit to limit how many tasks can run at the time. This file is not required to run the Dockstore CLI, so you do not need to do this to complete this tutorial, although we do recommend setting it up eventually if you will be working with WDLs that have scattered tasks in order to increase stability.
Set Up Local Data
Next thing I’ll do is create a completely local dataset and JSON parameterization file:
$> wget ftp://ftp.1000genomes.ebi.ac.uk/vol1/ftp/phase3/data/NA12878/alignment/NA12878.chrom20.ILLUMINA.bwa.CEU.low_coverage.20121211.bam
This downloads to my current directory. I could choose another location,
it really doesn’t matter. I’m using a sample I checked in already:
test.wdl.json.
{
  "bamstatsWorkflow.bam_input": "NA12878.chrom20.ILLUMINA.bwa.CEU.low_coverage.20121211.bam",
  "bamstatsWorkflow.mem_gb": "4"
}
Tip
The Dockstore CLI can handle inputs with HTTPS, FTP, GS, and S3 URLs, but that’s beyond the scope of this tutorial. For now, we are sticking with files that are on your local disk.
You can see in the above I give the relative path to the input under
bam_input and the memory in GB that I want to use for the task.
Run Your Workflow
At this point, let’s run the workflow with our local inputs and outputs via the JSON config file.
$> dockstore workflow launch --local-entry Dockstore.wdl --json test.wdl.json
What you see next will depend on which operating system you are using and the names of your folders, but the beginning of it will look a little bit like this:
Creating directories for run of Dockstore launcher in current working directory: /home/aduncan/Documents/dockstore-bamstats
Provisioning your input files to your local machine
Downloading: bamstatsWorkflow.bam_input from NA12878.chrom20.ILLUMINA.bwa.CEU.low_coverage.20121211.bam to: /home/aduncan/Documents/dockstore-bamstats/cromwell-input/aca839a6-92c4-4234-bc6d-460bcfe6f4d6/NA12878.chrom20.ILLUMINA.bwa.CEU.low_coverage.20121211.bam
Calling out to Cromwell to run your workflow
java -jar /home/aduncan/.dockstore/libraries/cromwell-30.2.jar run /home/aduncan/Documents/dockstore-bamstats/Dockstore.wdl --inputs /tmp/foo7282099563694004806json
That text is from Cromwell and the Dockstore CLI, preparing all it needs to do in order to run your workflow. Although some of it might not seem to make sense at first – why does a workflow running locally need to “download” files that are already on the local disk? – keep in mind that it needs to keep this process similiar to how it would run your WDL if it were in the cloud. By copying these files over, it is mimicking how they might be downloaded on a cloud environment. This duplication also prevents the original input files from being modified or moved to another place.
How long your workflow takes to run will depend on your computer’s hardware, but we have found running this particular workflow on the sample data provided takes less than 5 minutes on a 2020 Macbook Pro with 16 GB of memory. There is going to be a lot of text on the command line as your workflow progresses, and at one point it might even seem to pause. This “pause” is normal; when bamstats itself is executing, it does not output text to the command line. Once you see this text on your command line, you’ll know it’s finished.
Cromwell stderr:

Saving copy of Cromwell stdout to: /home/aduncan/Documents/dockstore-bamstats/Cromwell.stdout.txt
Saving copy of Cromwell stderr to: /home/aduncan/Documents/dockstore-bamstats/Cromwell.stderr.txt
Output files left in place
Scroll up a little bit and look for the following text (or something like it; remember that the folder names will be different):
Workflow bamstatsWorkflow complete. Final Outputs:  {
        "bamstatsWorkflow.bamstats.bamstats_report": "/home/aduncan/Documents/dockstore-bamstats/cromwell-executions/bamstatsWorkflow/4d24ebd1-5151-4b07-82d7-272b184fd0eb/call-bamstats/execution/bamstats_report.zip"
        }
This tells us that the final output can be found at:
/home/aduncan/Documents/dockstore-bamstats/cromwell-executions/bamstatsWorkflow/4d24ebd1-5151-4b07-82d7-272b184fd0eb/call-bamstats/execution/bamstats_report.zip
So what’s going on here? What’s the Dockstore CLI doing? It can best be summed up with this image:
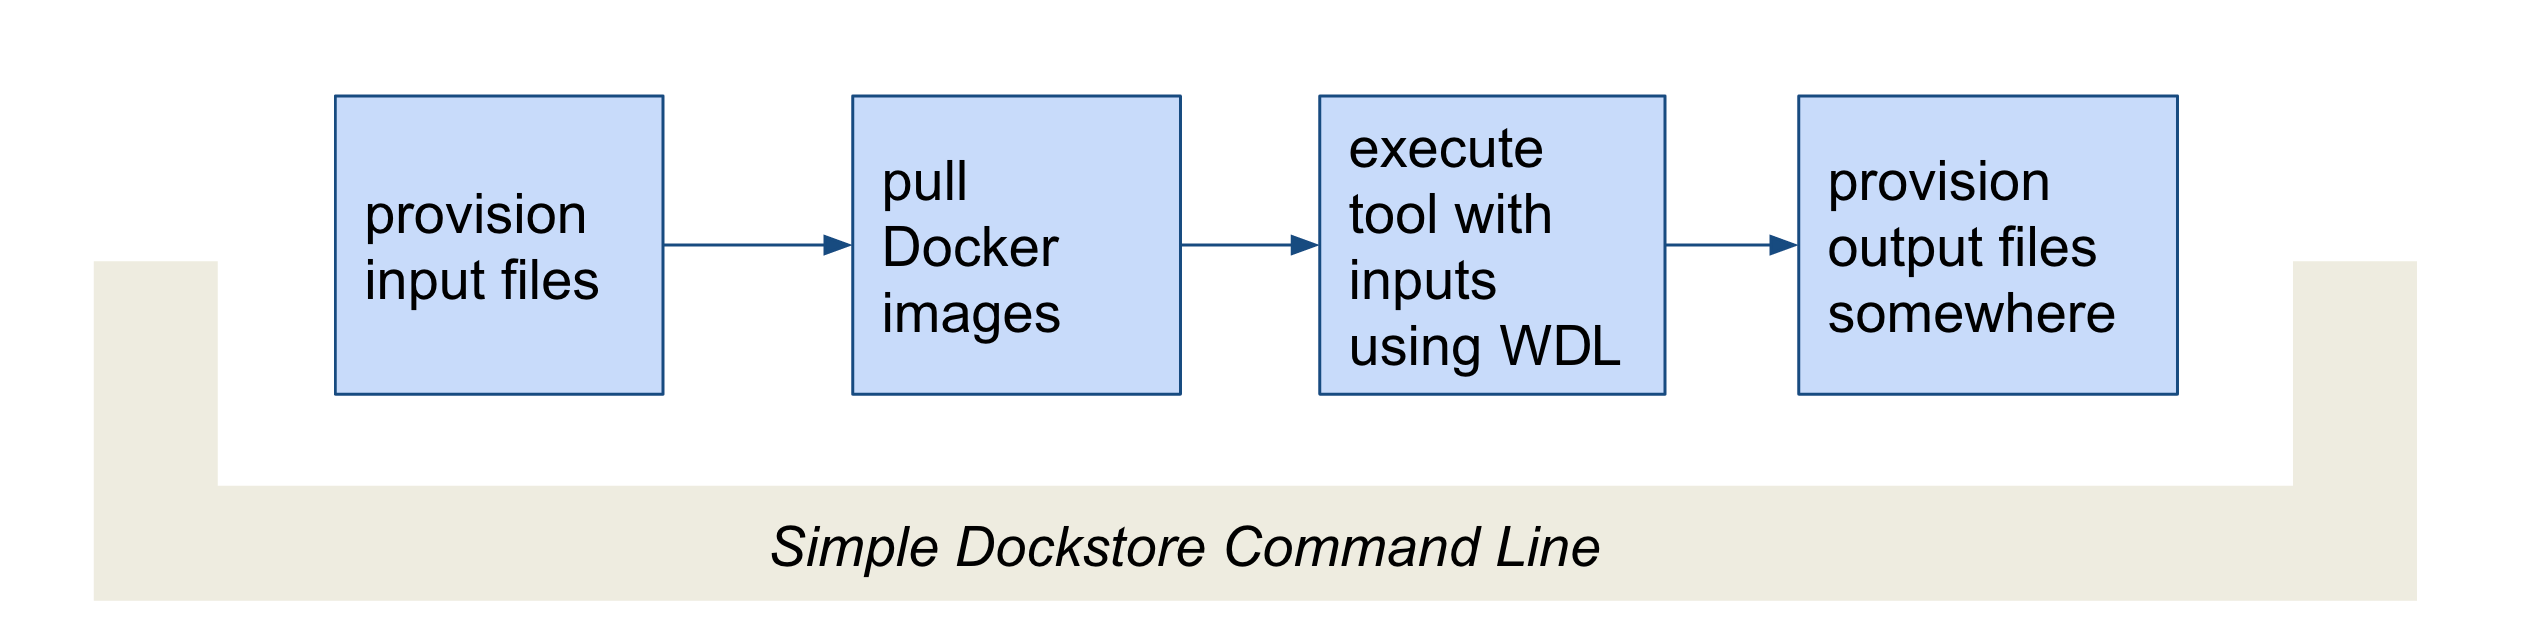
The command line first provisions input files. In our case, the files
were local so no provisioning was needed. But as the tip above
mentioned, these can be various URLs pointing to remote files. After
provisioning the Docker image is pulled and ran via the Cromwell
command line. This uses the Dockstore.wdl and parameterization JSON
file (test.wdl.json) to construct the underlying docker run
command. Finally, the Dockstore CLI provisions files back.
Tip
You can use --debug to get much more information during
this run, including the actual call to Cromwell (which can be super
helpful in debugging):
The following command is an example of how the Dockstore CLI calls out to Cromwell:
java -jar /home/aduncan/.dockstore/libraries/cromwell-30.2.jar run /home/aduncan/Documents/dockstore-bamstats/Dockstore.wdl --inputs /tmp/foo7282099563694004806json
Tip
The dockstore CLI automatically create a datastore
directory in the current working directory where you execute the command
and uses it for inputs/outputs. It can get quite large depending on the
tool/inputs/outputs being used. Plan accordingly e.g. execute the
Dockstore CLI in a directory located on a partition with sufficient
storage.
Adding a Test Parameter File
We are able to register the above input parameterization of the workflow into Dockstore so that users can see and test an example with our workflow. Users can manually add test parameter files through both the command line and the versions tab in the UI.
Tip
Make sure that any required input files are given as publically accessible URLs so that a user can run the example successfully.
Releasing on GitHub
At this point, we’ve successfully written a workflow language descriptor that describes how to run a program, and tested running this via the Dockstore command line. All of this work has been done locally; so if we encounter problems along the way, it is fast to perform debug cycles. At this point, we’re confident that the workflow is bug free and ready to share with others. It’s time to make a release.
Releasing will tag your GitHub repository with a version tag so you can
always get back to this particular release. I’m going to use the tag
1.25-6_1.1 Note that if you’re following the tutorial
using a forked version of the bamstats repo, your organization name
should be different. GitHub makes it very easy to release:
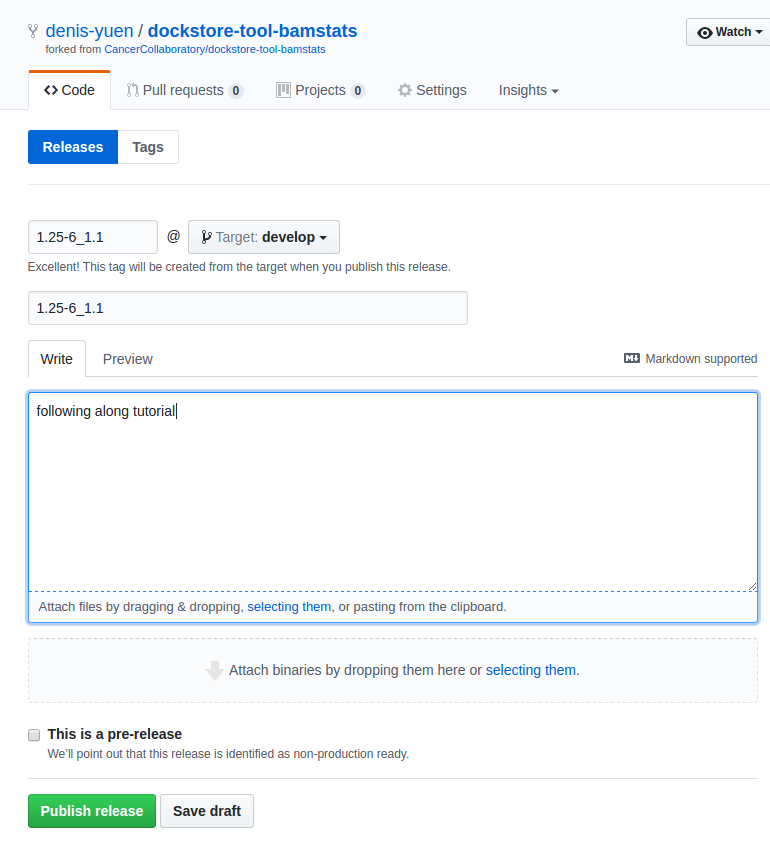
I click on “releases” in my forked version of the GitHub project page and then follow the directions to create a new release. Simple as that!
Next Steps
Follow the next tutorial to create an account on Dockstore and link third party services.