Legacy Workflow Registration Methods
Important
Workflows and tools added to Dockstore via our legacy registration methods do not automatically stay in sync with their source repository. Instead, someone with access to the entries on Dockstore must periodically log into Dockstore and press a button to trigger a refresh. Although this process is quick and will bring in all new tags, commits, and branches with the click of a button, it is easy to forget to do this and might not be appropriate for frequently-updated tools and workflows. For this reason, we recommend using GitHub App registration instead.
If you would prefer not to use GitHub App registration for your workflows, you can instead use one of these methods. These methods will work if your workflow is hosted on GitHub, GitLab, or BitBucket.
There are some ways to make the legacy registration process more seamless.
For your primary workflow descriptor, use the file suffixes
cwl,wdl,config(for Nextflow), orga(for Galaxy) depending on the descriptor language at the root of your repositoryFor your test parameter files, use the file suffix
jsonat the root of your repositoryThere should be one workflow per repository
By default, Dockstore will search the root of your repository for workflow related files. Following the above tips will help streamline the registration process, though you can still register workflows with non-standard format by using manual registration.
There are two types of legacy registration that are available: quick registration and manual registration.
Option A: Quick Register
Tip
Quick register does not support workflow names. Please use an alternative registration process if you would like to register a workflow with a workflow name.
Quick register provides a flow that lets you browse the repositories you have access to and quickly create workflows. You can access quick register by clicking the plus button on the My Workflows page. You’ll see a modal that looks like the following.
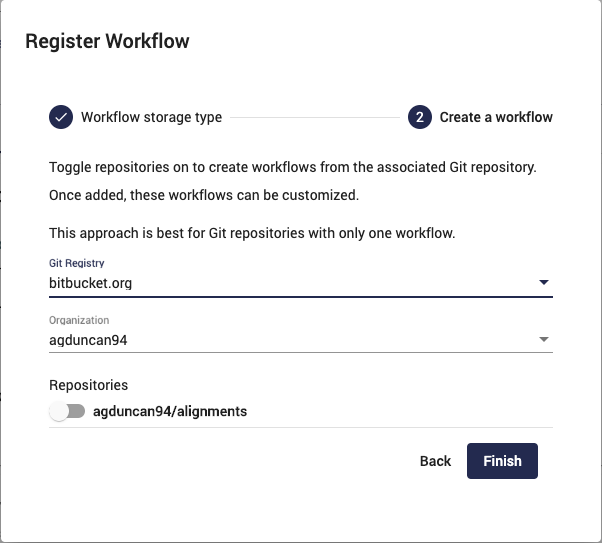
Use dropdowns to browse for repositories and use sliders to add as workflows
Once you’ve selected a Git registry and organization, you can see a list of all available repositories that you can add to Dockstore. There are three states the sliders can be in.
Off - There is no matching workflow on Dockstore. One can be created.
On - This repository already exists on Dockstore and can be deleted.
Disabled - This repository exists on Dockstore and cannot be deleted.
If sliders are in the off state then you can turn them on to quickly register a workflow for the repository. Once registered you can customize the workflow path, test parameter path, descriptor language, etc. The workflow will then need to be refreshed to get it synced up with Bitbucket/GitLab.
Note
Some users have multiple workflows within one Git repository, however each workflow entry on Dockstore only contains a single workflow. This is a problem as the Git path is used to uniquely identify a Dockstore workflow. The solution is to use manual register, defined below, which allows you to append a workflow name to the path.
Option B: Manual Registration of Workflows
In certain cases, you may wish to register workflows in a different source code structure, especially when working with complex project structures. For example, if you want to register two workflows from the same repository, you can use custom workflow names. This can be seen in the form below.
You can access manual register by clicking the plus button on the My Workflows page and selecting the custom registration.
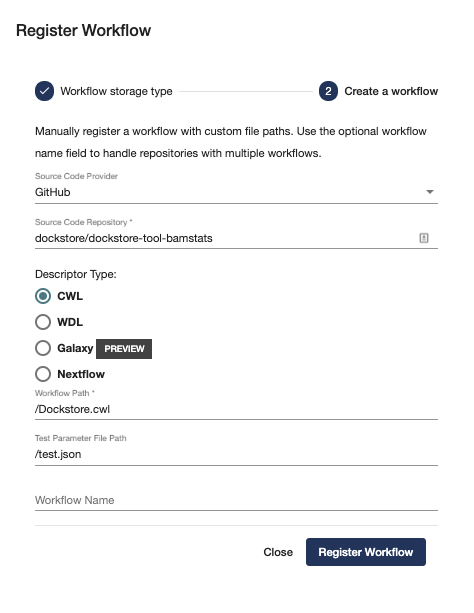
Fill out form to register a workflow
Upon successful submission of the workflow, a synchronization call will be made to fetch all available data from the given sources. This can be verified by going to the ‘Versions’ or ‘Files’ tab to see what content has been found.
Publishing Your Workflow
After you have successfully added your workflow onto Dockstore and have it
synced with GitHub, Bitbucket, or GitLab, you are now ready to share your
workflow with the public! Assuming that your workflow has at least one valid
version, you can publish your workflow for everyone to use. Simply select the
workflow on the /my-workflows page and click publish.